Dr. Zooch Falcon Heavy DRZ-48 Build Photos
I've built a few NASA kits recently, so I decided I should branch out and do some others.
Dr. Zooch makes this Falcon Heavy kit, as well as a Soyuz which is out of production at
the moment. From what I've read online his kits come highly recommended.
The kit comes in a sturdy cardboard box, which is nice. I've had a couple kits in
bags show up with dented and crushed parts.
There are a lot of tubes in this kit, all pretty narrow.
The components are all neatly bagged.
The fins are laser-cut balsa. This kit has fin units that are used for
flying but can be easily removed for display.
The instruction manual is thorough, has useful drawings, and is full of humor.
Likely due to copyright and licensing issues, there are only generic decals that
say "Falcon" supplied. I bought some decals from a user on eBay, but I wasn't
entirely happy with their quality or scale, so I made some of my own too using
images I photoshopped and printed out on inkjet paper.
Like most kits, this one starts with the engine mount.
The engine mount is glued into the main body tube, which consists of
two tubes glued together using a joining tube.
There were some lathe marks and flat tops on the balsa nose cones so I sanded
them smooth. On right is how they came, left is after sanding.
The center tube has a wider section at top that uses a paper reducer.
The fin units were pretty simple to assemble.
The instructions said the nose cone was ballasted, but mine wasn't. I found these
washers in the kit and figured they were for weighting the nose, but I double
checked with the nice people at erockets.biz and they
confirmed these should be glued to
the nose cone and fastened with the hook eye. I used CA glue.
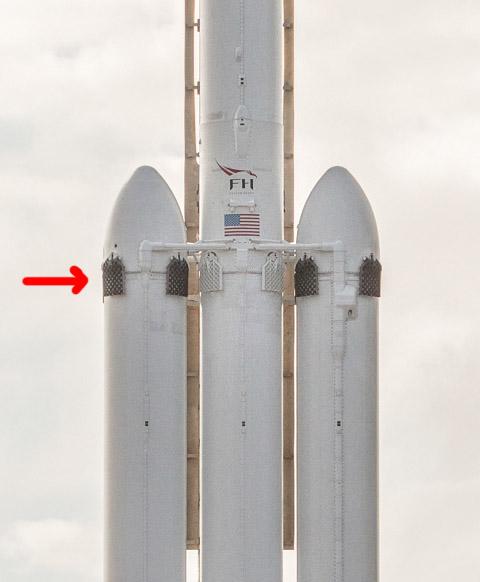
The Falcon has some retractable fin things that aren't represented in the kit.

the decal sheet I got from eBay has some nice decals representing them, but I wanted
mine to have relief like on the real rocket, so I cut some little house-shaped pieces
out of chip board, which I'll glue on, then apply the decals on top.
First round of plastic wood filler applied to smooth everything out.
After sanding. There are some pretty phallic components of this rocket.
Can you tell men designed these things? :P
The instructions say to glue the three tubes directly together, but the real
rocket has them spaced. It might be ill-advised stability wise, but I'm going
to attempt to glue them together with spacers I've cut from a 1/4" diameter dowel.
The cross members will help hold it all together (hopefully!)
The cardboard fin legs are hard to curve cleanly. I'll need to do some filler work
to get them smooth.
My little Monopoly houses installed
The instructions say to double up the four launch tube mounts, but my kit only came
with two, and they weren't the same size. I used some spare balsa to double them.
The real Falcon Heavy has some tubing that runs down one of the boosters. I'm going to
replicate this using some kabob skewers that I've split with an Xacto knife.
I've also added narrow strips of masking tape that I intend to leave on, to replicate
some of the more subtle relief on the body tubes of the original rocket. Shown here after paint.
Time for decals.
I ended up making some more of my own decals because I wanted some to be
subtler, so I printed them in a medium grey color, such as the rectangles on the fins.
I also made lighter grey versions for the inner tube's retractable upper fins, which are
painted white rather than black on the real rocket.
I clear coated all the decals with gloss lacquer, then coated the entire model with
Tamiya flat. Here i've installed the parachute.
I still got some silvering of the decals. I think next time I'll do a coat of gloss under them too.
Here it is with the fin units, as it would be set up for launching.